Laser marking is the process of changing the color of a part in order to add an identifying mark to a finished product. This process leaves behind no ink that can be rubbed or washed off. When set up properly, it’s a very fast and efficient process. To help us understand what makes a good mark, we first need to understand how lasers work. A laser marks a substrate by using a combination of the power, frequency, speed, and overlap of the beam to expose the surface of a material to energy. This will ideally alter the material to change the color wherever the beam makes contact.
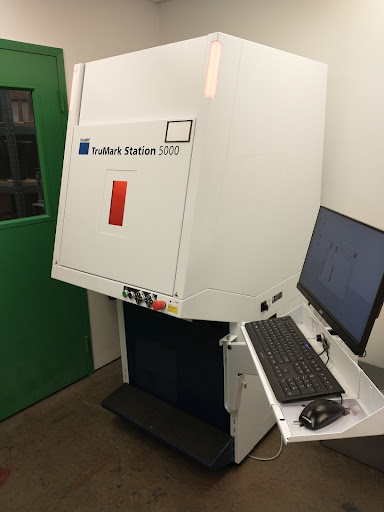
TRUMPF Laser System
Pictured above is Apple Rubber’s recently acquired TRUMPF Laser System, complete with an X-Y moving table. This system allows us much greater throughput and efficiency in our marking process.
Substrate Material
While not part of the laser itself, the substrate material is the most important part of the marking process. The type of pigment and the amount of pigment used are critical to creating a mark on a part.
Since the laser changes the color of the pigment by darkening it, clear and black materials aren’t able to be marked. Not every pigment is capable of marking the same way. The best markings are produced by pigments containing Titanium Dioxide or a whitener. In our experience, using Titanium Dioxide produces some of the best marks since the background color also increases the visibility and readability of the mark.
The amount of pigment used is also very important. There needs to be enough in the material to create an opaque surface. Lower pigment levels can leave a material with a semi-transparent look. While they can be marked, the marks appear fuzzy. This is because the laser beam can penetrate past the surface of the material, causing the spillover of UV light to disperse past the focus of the beam.
The amount of pigment also plays a role in the batch-to-batch variation of a material. Pigments are typically held within an acceptable range for any given material. The levels need to be high enough to ensure that the part stays opaque enough for marking when at the minimum acceptable levels.
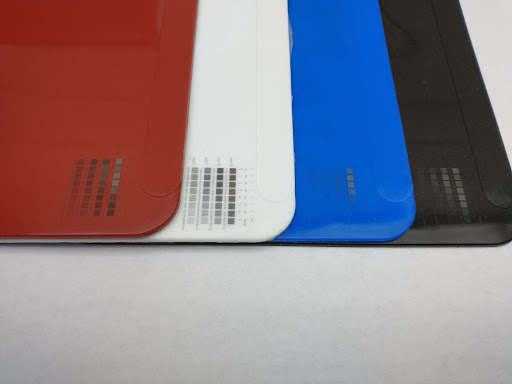
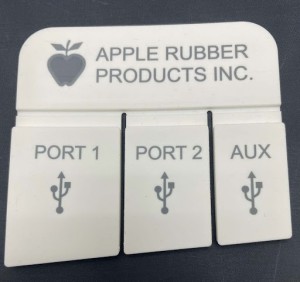
Laser Mark on Colors
Pictured above are examples of four different pigments and how the various laser settings change the strength of the mark. The gray squares in the right corners of the red, blue and black materials are ash. This is because the energy imparted to the material was enough to scorch the surface of these materials.
Laser Power
The power is the raw wattage of the laser. At Apple Rubber, we use a UV laser with a lower power. Lasers like this in the 3-5 watt range allow us to tint the pigment and create the mark. By controlling the power of the laser, we can tint the surface of the part to create a mark, essentially giving the pigment of the substrate a suntan. Without a lower power laser the beam might initially burn, scorch, or even cut through a material. This would destroy the surface rather than create a nice color change effect. Even at this lower power it is possible to burn and ablate away material if the rest of the settings are used too strongly.
Laser Frequency
The frequency of the laser determines how many pulses hit the substrate. The faster the pulses are generated, the more energy hits particular places as the laser moves.
Laser Speed
The speed of the laser is how quickly the scanner moves across the surface of a part. The scanner is essentially a group of motorized mirrors that aim the beam to mark a part. The speed at which the beam moves across the surface of the part can be increased to reduce how much energy is being added to a part, while going slower will increase the amount of energy.
Fill Spacing
The overall energy imparted into a substrate can be controlled by changing the distance between passes of the beam. When filling in a letter or object, the passes can be set to a specific distance (for example, .02 mm). When filling in said letter, the beam will move in a set pattern, creating a set of parallel lines spaced .02 mm apart. To impart extra energy into a material, a crosshatch will sometimes be used where the lines are first run from top down and then from left to right in a second pass. As with the other parameters, spacing them closer together increases the amount of energy being imparted into the material.
By combining these parameters, the laser can become strong enough to ablate away material and engrave parts, or it can be dialed down to mark part information, serial numbers, and even grayscale images. Getting your settings right and using a good material is critical to creating a crisp, readable laser mark. When all these elements are all synchronized, the laser is capable of producing some impressive marks.
Interested in laser marking?
Contact the engineers at Apple Rubber today!