his guide covers the process for making rubber test slabs, from milling the raw material to trimming the final product. These slabs are used for material testing and therefore need to be uniform in thickness and free from defects.
Materials & Equipment Needed
- Uncured rubber compound
- Two-roll mill
- Mold (with correct cavity size)
- Hydraulic press with heated plates
- Release agent (if needed)
- Cutting tools (razor blade or scissors)
- Calipers or micrometer
- Cooling plate
Milling the Rubber
Set up the two-roll mill with the appropriate nip gap width based on the volume of rubber being processed. Feed the rubber through the mill several times to ensure uniform mixing and proper dispersion of any fillers.
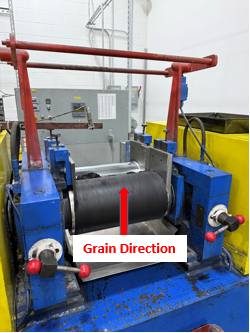
Understanding Grain Direction
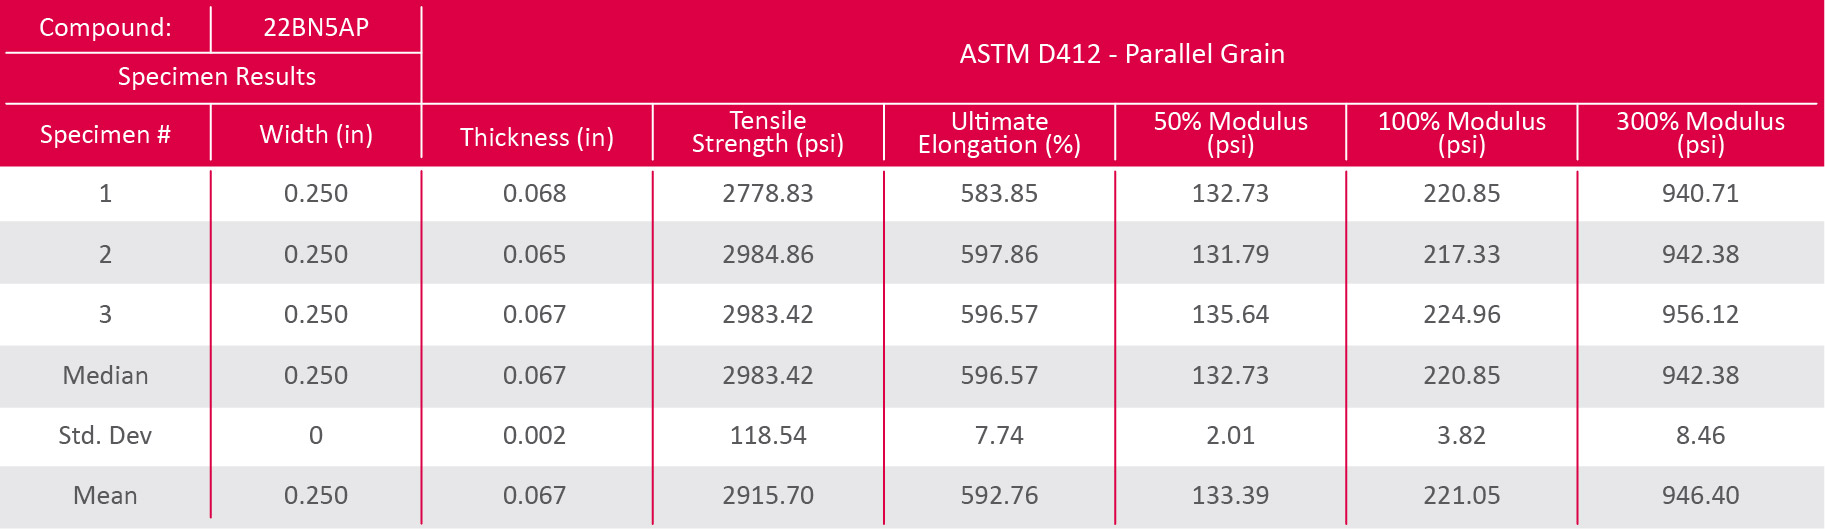
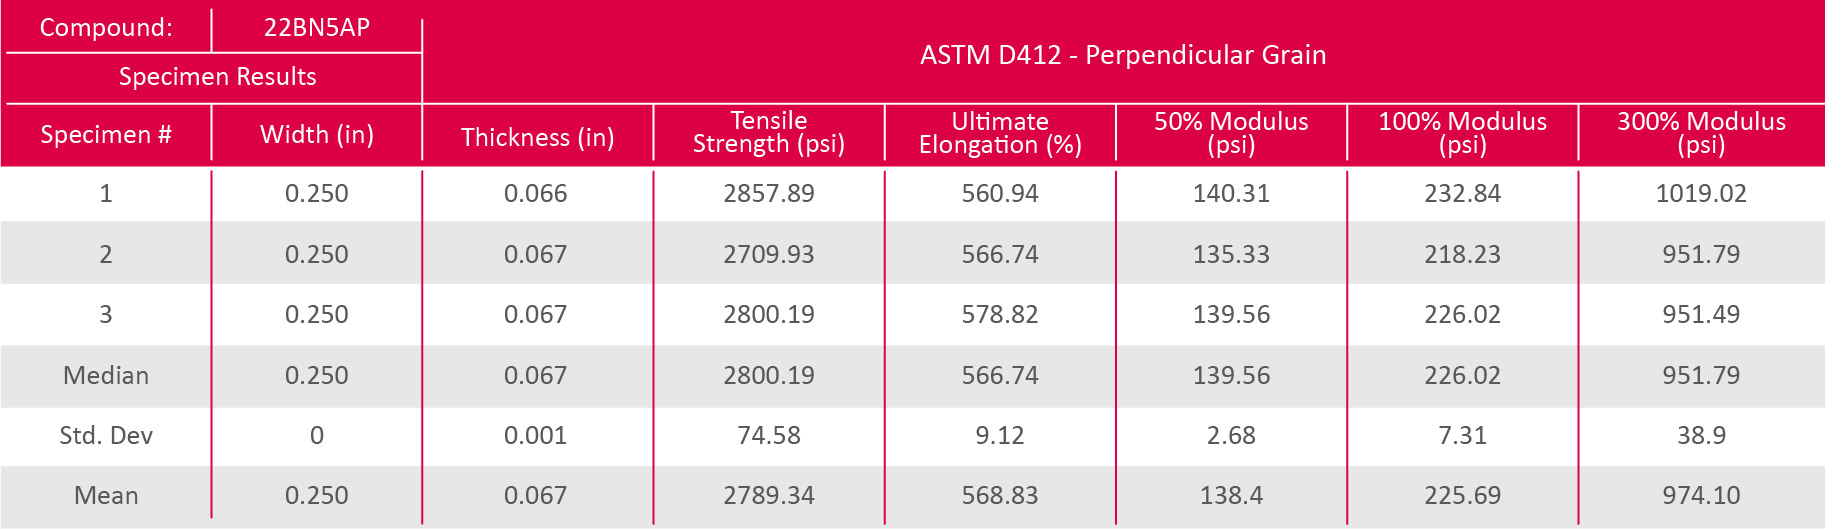
Rolling the rubber in one direction aligns polymer chains and fillers, creating a grain direction. The mechanical properties—including tensile strength, elongation, and tear resistance—will be stronger parallel to the grain direction and weaker perpendicular to it. Testing shows that tensile strength perpendicular to the grain is typically 4.3% less than tensile strength parallel to the grain direction.
Prepping the Rubber
Store the rubber compound at the correct temperature and humidity before processing. Cut and weigh the required amount of material to ensure consistency across batches.
Calculate the required rubber weight based on the mold volume and the density of the rubber compound: Rubber Weight = Mold Volume × Material Density

Accurate calculation helps minimize excessive flash and ensures a high-quality test slab. Too much material will produce excess flash, while too little may result in voids.
Molding the Slab
- Clean the mold and apply release agent if necessary
- Preheat the press and mold to the correct curing temperature
- Load the rubber into the mold, placing it evenly with grain direction parallel
- Close the mold and apply pressure in the hydraulic press
- Maintain specified pressure, temperature, and time for complete vulcanization
Managing Flash & Finishing
Flash thickness should generally be between 0.005 inches (0.13 mm) and 0.020 inches (0.50 mm), depending on mold design and processing conditions.
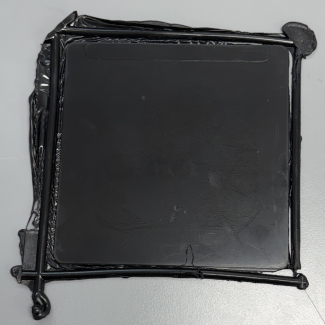
Excessive flash (over 0.030 inches or 0.76 mm) may indicate:
- Too much rubber in the mold
- Improper mold closure
- Excessive pressure during molding
Remove flash using a razor blade, trimming press, or grinding tool. Flash should be cleanly removed without damaging the slab’s surface.
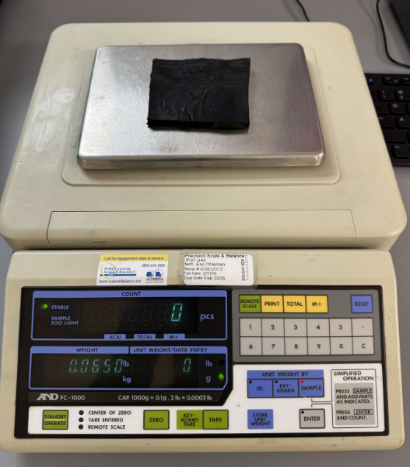
Check thickness using calipers or a micrometer across the entire slab. Note that thickness may vary ±0.003 inches from top to bottom when using a compression slab mold without press vacuum capability.
Some rubber compounds (Fluorocarbon/Silicone) require additional heat treatment to remove residual chemicals or enhance properties. Follow the manufacturer’s guidelines for post-curing.
Final Checks & Storage
Allow slabs to rest for 24 hours before testing to ensure the material is fully cured. Measure and record dimensions to verify compliance with requirements. Store slabs in a clean, dry area to prevent contamination before testing.
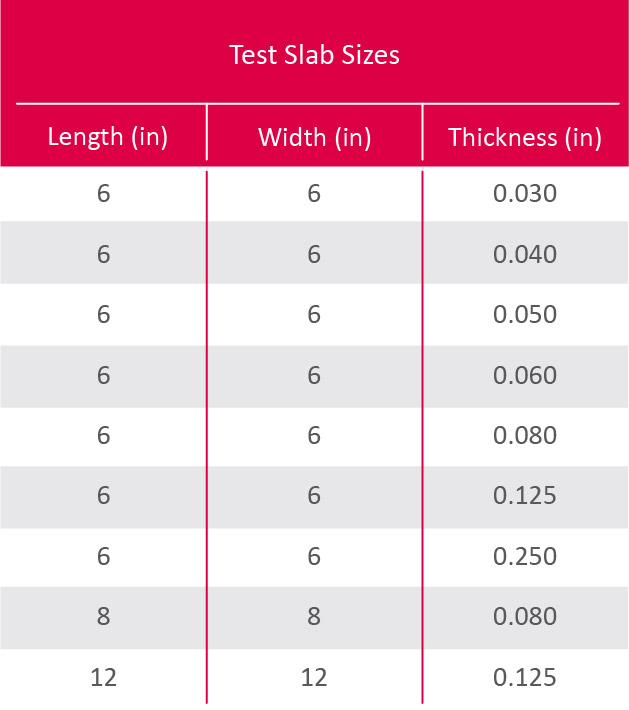
Test Slab Size Options
At Apple Rubber, we offer various test slab sizes as well as custom mold creation for specific dimensions. Below are options we have available: