In the previous article, the nSpec 3D® was presented as the new way of measuring surface finish on parts. This time around, we’ll compare the nSpec 3D® to the traditional method of measurement via a stylus.
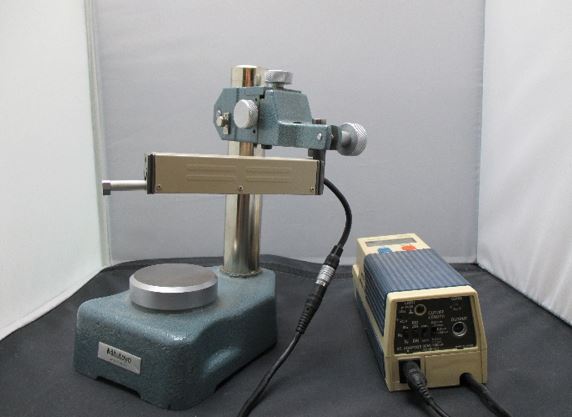
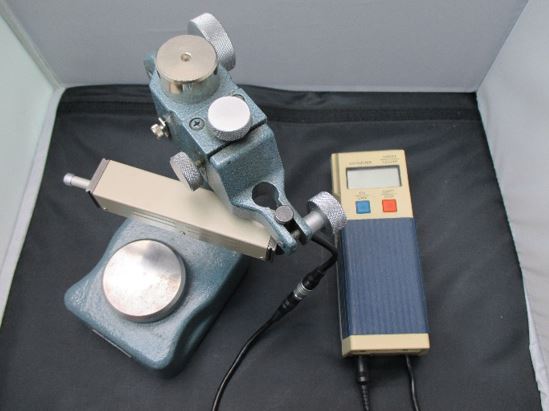
Figure 1: The side (left) and birds-eye (right) views of the Mitutoyo Surftest-212
The stylus being used is a Mitutoyo Surftest-212, shown in Figure 1. The measuring tip retracts in a straight line back into the device and measures sensitive changes in z-height to determine surface roughness. The stylus is fixed on to a mount to stabilize measurements and prevent manual interaction during operation. To determine the accuracy of the device, it was used to measure the same GAR Reference Standard used by the microscope in the previous article. The results are presented in Table 1 below:
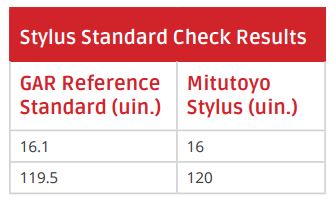
While the Surftest-212 reports in whole numbers, the device demonstrates its ability to accurately measure surface roughness. This article is poised for comparison only, therefore specifications on the design and operational techniques Surftest-212 can be found on Mitutoyo’s website.
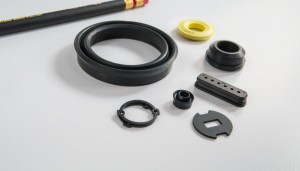
For this study, a rubber sample was molded with two different surface finishes on either side: one smooth and one rough. This sample will be the measurement surface to compare the results of the microscope and the stylus. The two sides are represented in Figure 2 below:
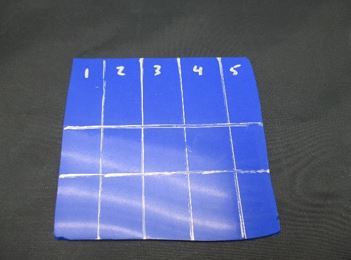
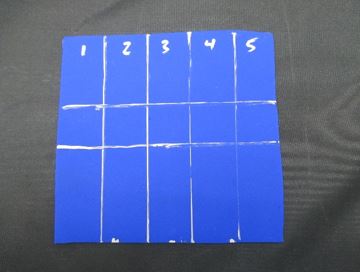
Figure 2: The Smooth (left) and Rough (right) Surface Samples
The surfaces are partitioned to give general sampling areas for both the stylus and the microscope to measure. This is done in an effort to eliminate bias as to where comparative measurements are taken. In theory, the surface roughness should be uniform across the sample. However, as the surface roughness is transposed from mold to part, this is not the case. This is a topic that will be addressed in a future article.
The results from the measurements are detailed in Table 2 below:
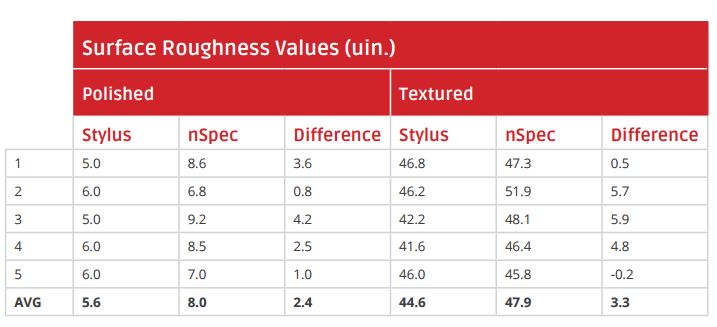
Roughly 5 measurements were taken on each surface and the averages taken are listed above. For simplicity of the article, each individual measurement was not included in the report. The results show that the stylus and microscope are able to report consistent numbers close to not only their average measurements, but also one another.
The importance of using a non-contact measurement device can be seen through the interaction between the stylus and the material. With rubber, as well as other softer materials, the material is able to take the pressure induced by running the stylus across its surface. However harder surfaces, like our metal standard, will become scratched or damaged, as seen in Figure 3 below:
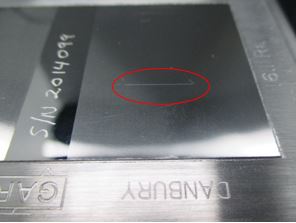
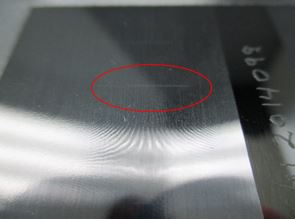
Figure 3: Scratches on Surface Roughness Standard
This will cause issues for parts being measured. The parts will either have to be destroyed when used in sampling or will be sent out with aesthetic defects. Some parts cannot afford this, therefore making contact measuring ineffective.
The other issue arises from parts that are not perfectly flat. Smaller or curved parts, such as the O-Rings we manufacture, cannot be measured by the stylus. The microscope has a greater functionality in its ability to measure not only small parts, but also curved surfaces.
What challenges have you come across while measuring surface finish of rubber parts? Let us know. Connect with us on Twitter or LinkedIn or contact our engineering team for assistance.